Interactive Projection Setup
Mounting interactive floor setup
This guide shows practical examples of how to mount the projector and camera for an interactive floor installation. You'll see different mounting approaches and real-world setups used in our testing environment.
Basic mounting requirements
Mount the projector so that it faces the same surface as the camera. There are many ways to do this. The most popular approaches are described in our Help Center on the Working Environment subpage.
Make sure the camera sees the whole image displayed by the projector. Depth cameras have small angles of view and therefore often must be placed above the projector (1-2m above, depending on the projector throw ratio and size of the displayed image). Top central mounting above the interactive area is often a choice, but you can also work with a side camera mount. Remember that people playing in the interactive area shall be in front of the projector and not have the projector behind their backs due to the shadow effect.
Mobile installation with stands
Below is a visualized mobile installation idea for a short throw projector (0.6) and a depth camera. Both devices are mounted using stands/tripods. For the projector use a special mount enabling to face the projector down to the floor (i.e. projector plate and 90 degree ball head mount). For the camera use a boom stand.
You can also combine these two devices on one tripod/stand with two mounting points.
Alternatively, you can use an ultra-short throw projector and place it just above the floor.
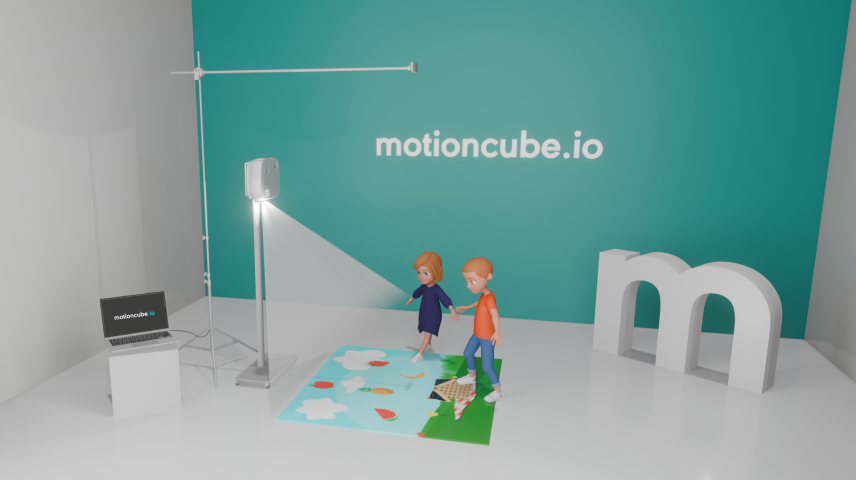 The idea for Motioncube interactive installation with a short throw projector and a depth camera
Ceiling-mounted installation
Below you can see our interactive environment for testing. We used a short throw projector with a throw ratio of 0.58 and mounted it to the ceiling on the side.
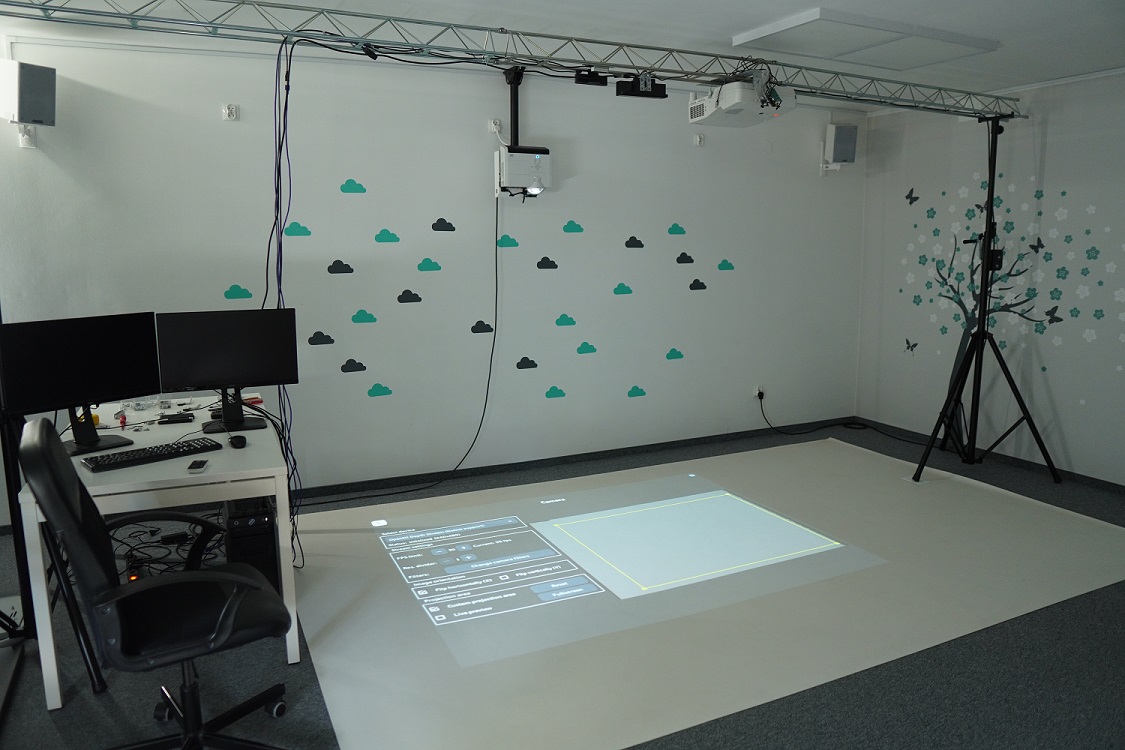 Motioncube interactive installation for testing
Camera mounting examples
Below you can see how we installed the cameras to perform our tests. We used a lighting ramp that allows you to mount any elements to the frame. The viewing angle of the cameras is smaller than the projection angle. Cameras are placed much higher than the projector to capture the projection area.
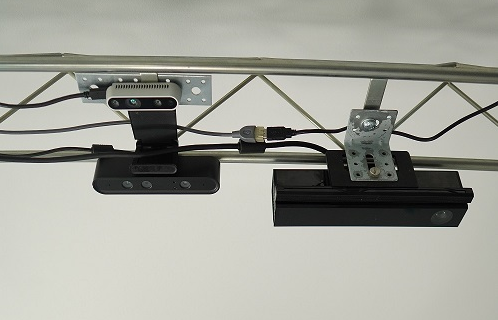
Depth cameras for testing mounted to the frame
Summary
These examples show that there are multiple ways to mount your interactive floor setup:
- Mobile setup - using tripods and stands for portable installations
- Fixed setup - ceiling-mounted for permanent installations
- Custom solutions - using frames, ramps, or other mounting structures
The key is to ensure the camera can see the entire projection area while minimizing shadows for users in the interactive space.
For detailed calibration after mounting, see the Your first interactive floor guide.
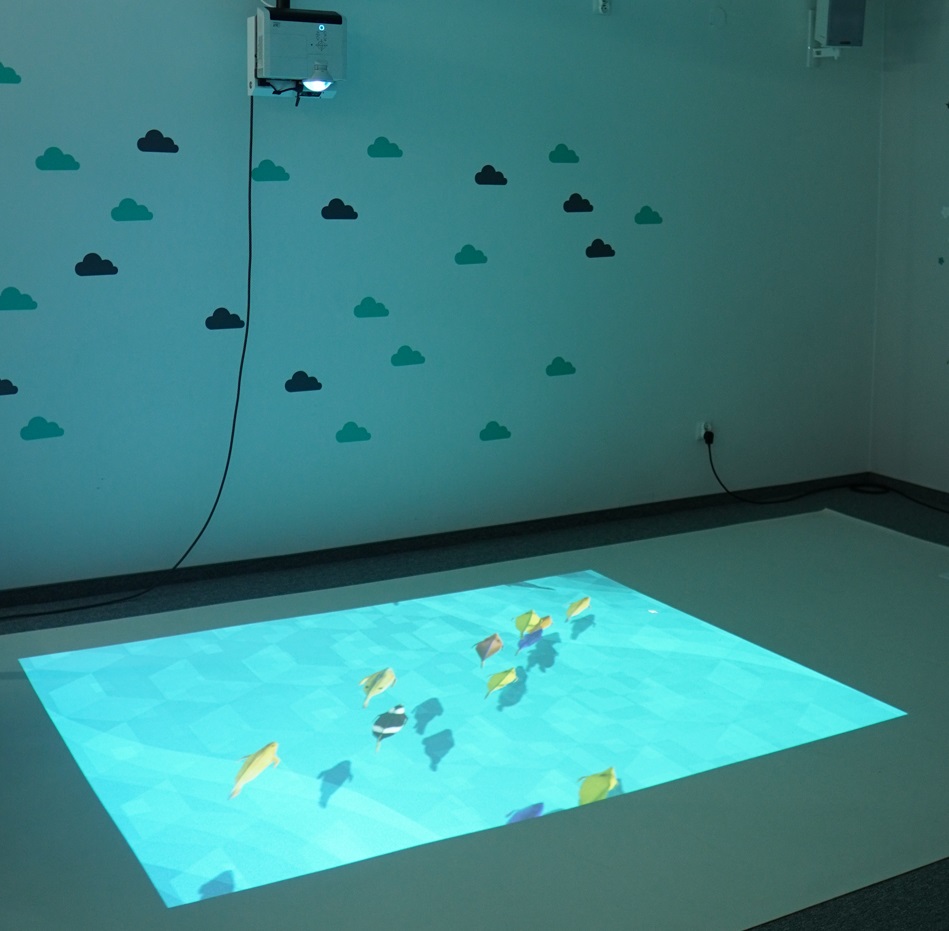 Interactive Motioncube 3D Fish projected on the floor - experiments with depth cameras
Manage Consents
Control which external services can process your data.
Essential Required
These features are essential for the proper functioning of the website and cannot be disabled.
Anonymous Analytics Required
Required for collecting aggregated statistics that help us understand how users interact with our site. Data is fully anonymous, contains no personal information, and we do not use cookies.
Extended Analytics
Allows analyzing traffic sources (where you came from), marketing campaign parameters (UTM), and navigation paths across subdomains. We use a cookie (7 days) to preserve this data.
External Media
Allows loading content from external services like YouTube or Vimeo.
