Working environment
Set up your own interactive floor kit or entrust this task to a local installation company specializing in the installation of multimedia devices. This document will tell you how to prepare the installation stand yourself.
Warning
The purpose of this documentation is to show you the different mounting and hardware configurations that Motioncube can be used with. Descriptions in this document are provided for informational purposes only. The producer of the Motioncube software - LavaVision is not responsible for their use.The principle of operation of an interactive floor
The projector projects an interactive animation on the floor. The camera sees your movements, the computer analyzes them and observes the changes in the animation.
General mounting diagrams
Option 1. The projector and video camera are located just above the floor (Fig.1).

Option 2. The projector and video camera are mounted on the side at the top (Fig.2).

Option 3. The projector and video camera are mounted centrally over the projection area (Fig.3).

Usage visualizations
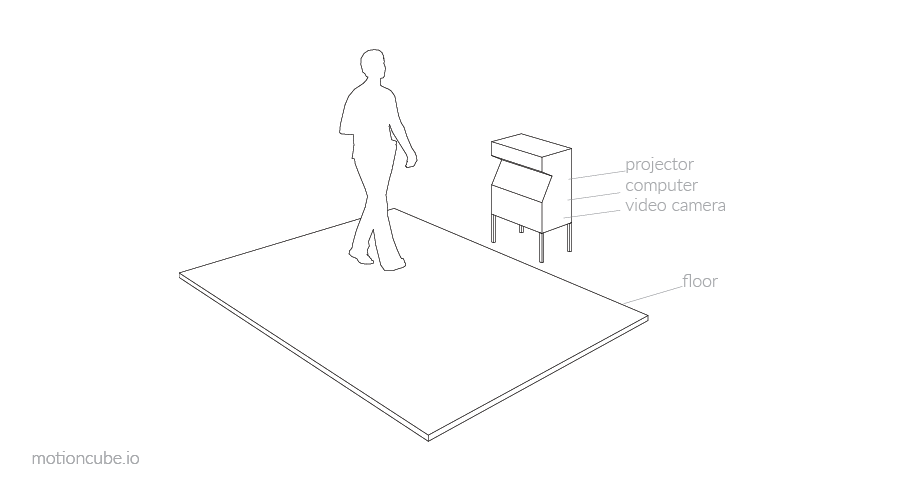
Option 1: Position on the floor
Mobile version. The whole can be built into a small piece of furniture placed on the floor.
Requirements:
- PROJECTOR: Ultra-Short-Throw with a projection factor in the range 0.25 - 0.35.
- Projection area smaller than for top side or top mounting, approx. 2m x 1.5m.
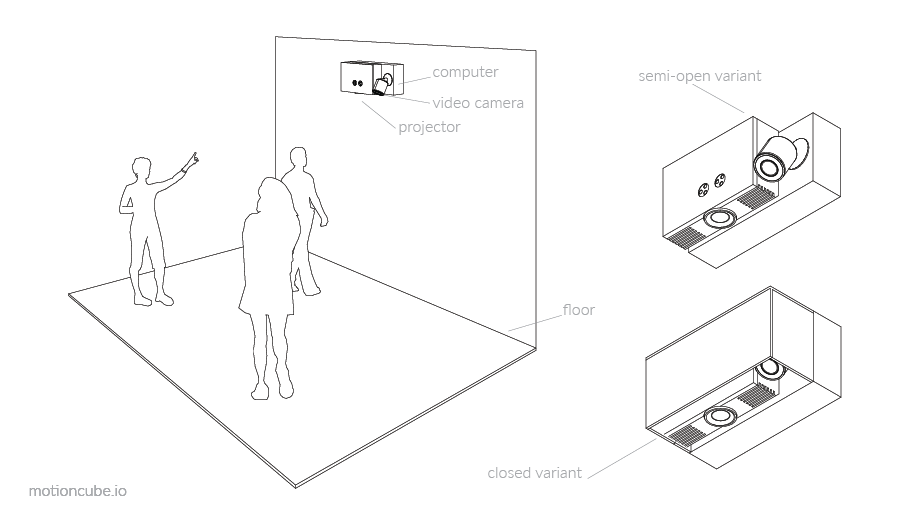
Option 2: Wall mounting
Fixed installation. The elements are mounted on the wall / shelf at a height of approx. 2m. Various variants of equipment casing: semi-open and closed.
Requirements:
- PROJECTOR: Short-Throw with a projection factor in the range 0.45 - 0.75.
- Sample projection area for a height of 2m: 3.2m x 2.4m.
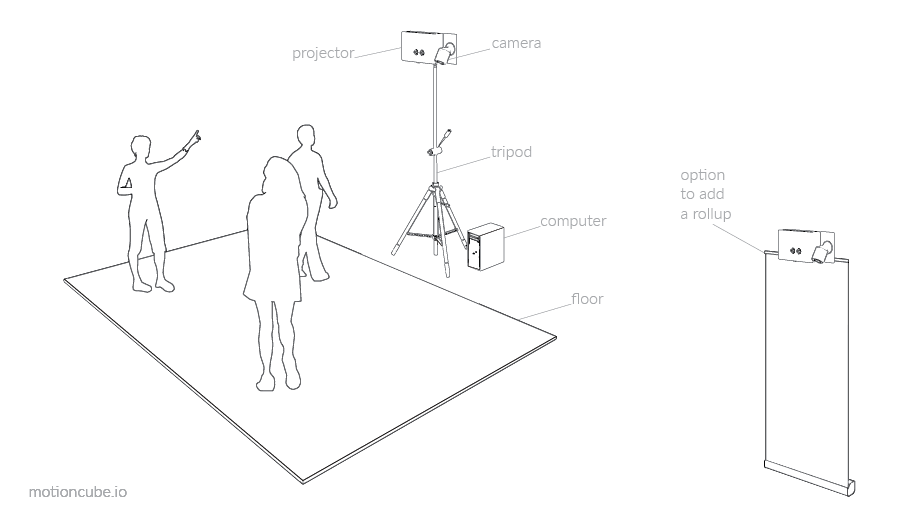
Option 3: Set on a tripod
Mobile version. The projector and video camera are mounted on a tripod at a height of approx. 2m. You can use a rollup to cover the tripod.
Requirements:
- STAND/TRIPOD: lighting / sound / stage, lift type (with crank) / individually designed mobile stand.
- The projector and projection area are the same as for top side/wall mounting.
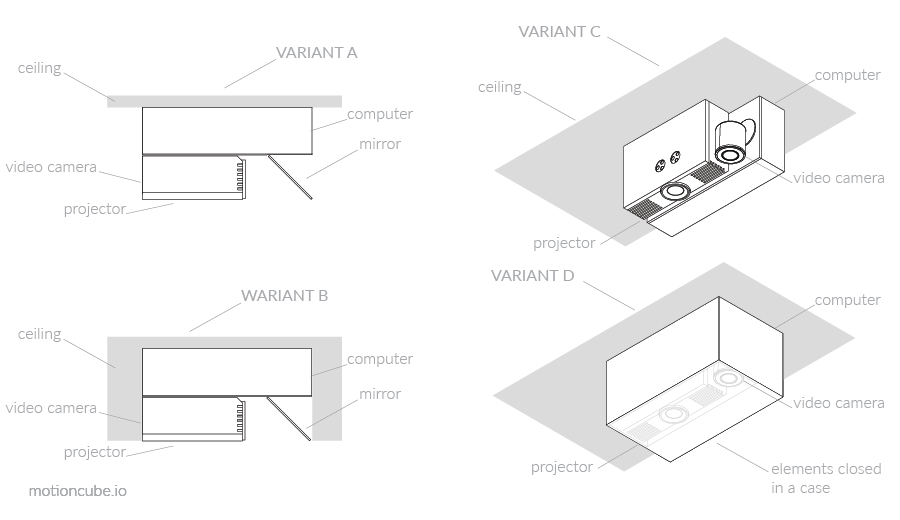
Option 4: Ceiling installation
Fixed installation. Mounting at the ceiling (optional installation in a suspended ceiling - variant B), centrally above the floor. Possibility to install a computer (variants A, B, C) or all elements (variant D). If the projector is mounted horizontally, use a mirror to project the projection onto the floor (variants A and B).
Requirements:
- PROJECTOR: recommended projection ratio 0.8 - 1.2.
- The size of the projection area depends on the mounting height.
Option 5: Projection on the table
Fixed installation. Variant for ceiling installation. Projection onto the table top instead of onto the floor. Interaction with the application with the hands.
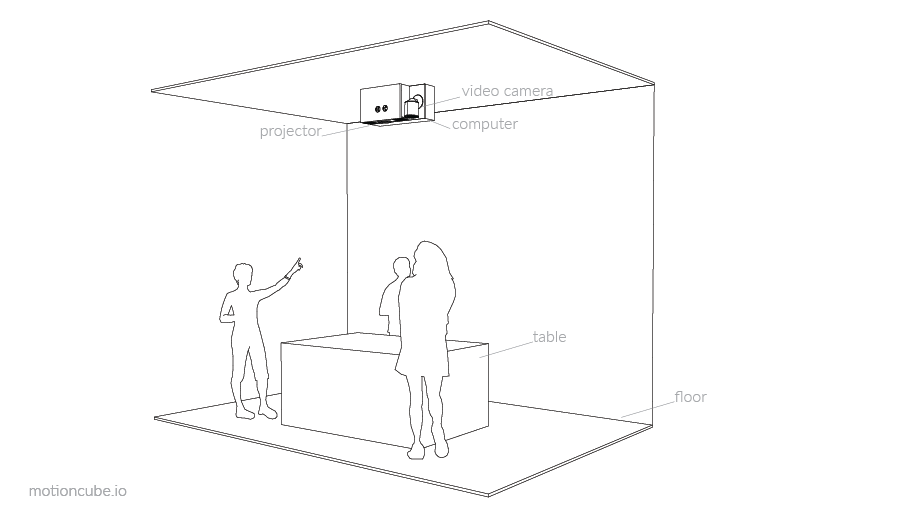
The size of the projection area depends on the mounting height, table height and projector projection ratio.
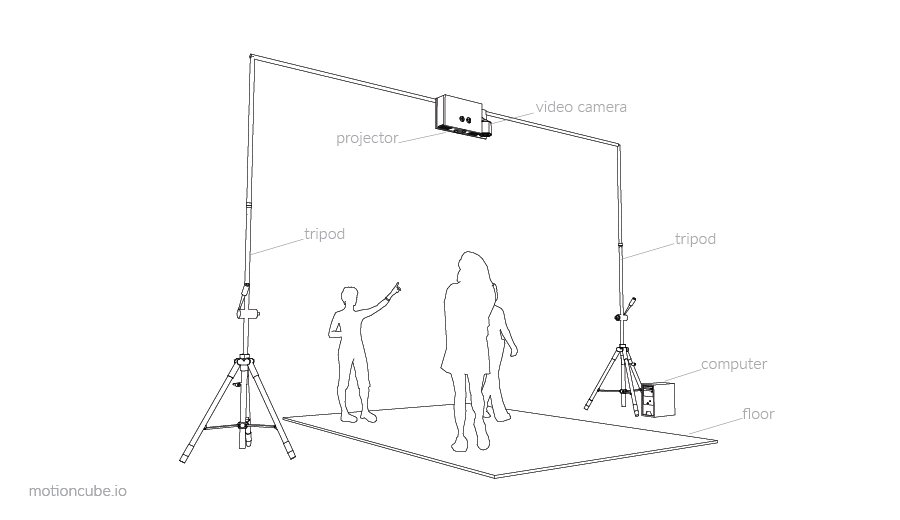
Option 6: Frame mounting
Mobile version. Mounting on the frame, instead of on the ceiling.
Requirements:
- CONSTRUCTION: Prepare an installation kit yourself or use the lighting ramp to mount the projector and video camera.
- The projector and the size of the projection area are the same as ceiling mount.
Practical advices
Read our tips to prepare a safe and optimal working environment for your interactive floor.
Security
- Remember the health and safety rules. Make sure the configuration you choose and the installation location are safe for everyone.
- Consult a person with appropriate qualifications and authorizations regarding the power supply.
Substrate:
- Use a light, matte and uniform substrate to obtain a good quality image.
Light Control:
Limit the amount of light in the room to get a clear image from the projector.
Make sure that there is no sunlight on the projection area - the sun emits not only visible light, but also infrared light, which, if it falls on the interaction area, may interfere with the operation of the interactive floor.
Make sure the device with integrated IR illuminator is not facing the interaction area. In particular, CCTV cameras have an integrated such illuminator and, depending on the external lighting, they turn on or off the IR light, which can lead to unstable operation of the interactive floor.
